DIY Painted Bathroom Vanity

Hey, hey , hey, y’all! Happy Sunday! Today, I wanted to share my DIY painted bathroom vanity. When I moved in, this home had the 1979 oak cabinetry that everyone knows and hates. LOL! I am embarrassed to say that it took me almost 5 years to get around to doing the guest bathroom but I finally did it.
If you know me, you know I love white cabinets. So, of course I went with my all time favorite white which is Cameo White by Behr. To me, it is the perfect white with no yellow or beige undertones.

Step 1: Remove cabinet doors and hardware. FYI, when doing this, make sure you mark which doors go with which hardware. You will thank me.
Step 2: Clean the cabinets and the doors really well with a mild cleaning solution. I used clorox wipes for this step.
Step 3: Sand down the cabinets and the doors really well to remove any lacquer from the old paint/stain job. This is super tedious, I am not gonna lie to you. I think this step is why I waited so long. ARGH! But, once this is over it is smooth sailing.
Step 4: Clean the cabinets and doors again to remove any sanding residue.
Step 5: Paint the doors while they are off of the cabinets. I painted one side of each door and then allowed them to dry and turned them over and painted the other side. I let them sit overnight and did Step 6 while they were drying.
Step 6: Paint the cabinets. I did two coats to make sure they were evenly coated.
Step 7: I decided to spray paint the hinges because they were an antique brass and I wanted them to be black. I used Rustoleum Flat Black. Allow the hinges to dry completely and then attach them to the doors.
Step 8: I wanted black knobs to match the black hinges so I bought these…
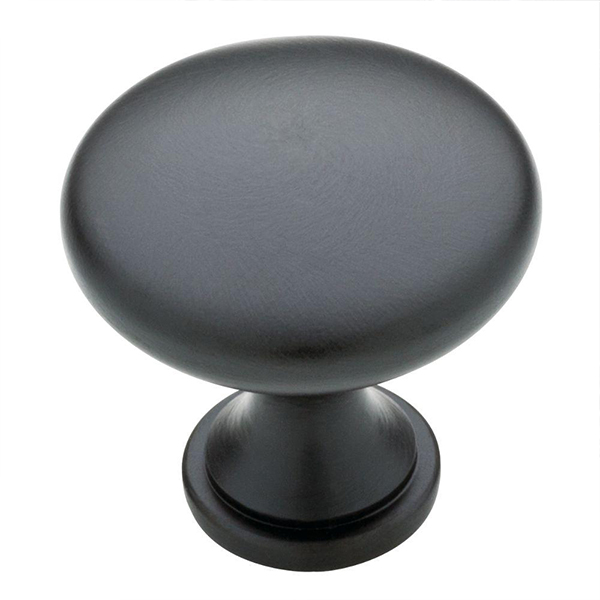
Attach the knobs to the doors before placing them on the cabinets.
Step 9: Attach the doors to the cabinet bases. I hope you marked which doors go on which insert. Believe me, I have forgotten that step before and it was no fun.
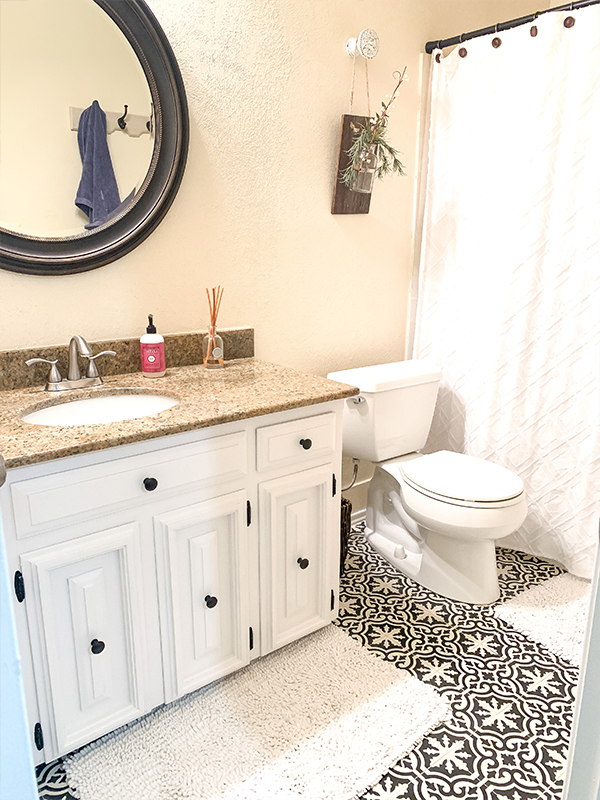
Well, here she is in all her beauty. I am so glad I finally did this, now we are moving.
haha
typical huh?
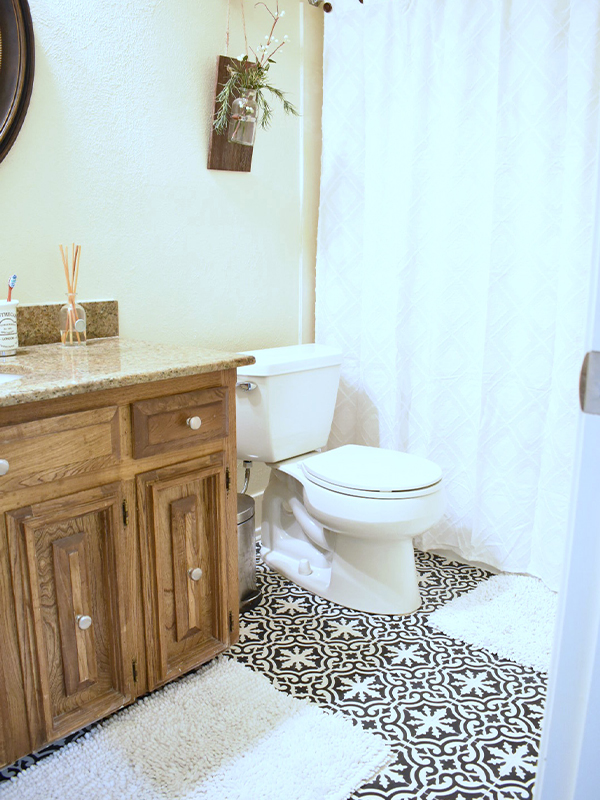
Before:
After…..
Hopefully that helps you when it’s time for you to do your own DIY Painted bathroom vanity. It is not hard at all, it just takes a few days due to the paint drying process. Be sure and check out my other DIY projects. Have a blessed day friends!